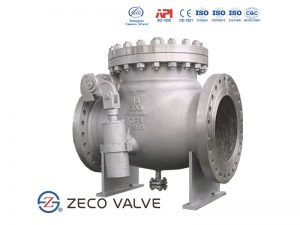
Stainless Steel Swing Check Valve
Description
Check valves are backflow prevention devices designed to prevent the fluid (liquid or gas) from flowing backward into vital process systems. The swing Check valve has a stainless steel body and trims along with a flanged connection. The pressure rating can be 150LB to 2500LB
What is a Stainless Steel Swing Check Valve?
Stainless steel swing check valves are designed and manufactured strictly to International Standards API 6D, BS1868, ASME B16.34 or Equivalent, o reduce the flow resistance and pressure drop to the minimum possible extent, which is suitable to be mounted in horizontal position only, lapped and screwed in seat ring ensures tight shut off and long duration service. Valve’s disc is perfectly designed, accurately machined, and guided for efficient automatic shut-off at zero pressure, with a feature of compact structure & Low emission service. In both Swing & Piston Constructions.
ZECO is a professional manufacturer of swing check valves, stainless steel materials can be selected as ASTM A351 CF8, ASTM A351 CF8M, ASTM A351 CF3, ASTM A351 CF3M, UNS S32205 or super stainless steel materials, and so on. ZECO is very strict about the testing of raw materials. All stainless steel materials must undergo spectral testing and physical analysis when they arrive at the factory, and only when they meet the requirements of international standards can they be allowed to enter the factory and start the formal processing process. ZECO’s stainless steel swing check valve opens the disc fully in the line to prevent disc media flow and increase flow resistance. The swing check valve is the most important process requirement in the disc sealing surface and valve body sealing surface because there is no external force to help seal, so only the disc and valve seat sealing surface can be closely matched to achieve the complete sealing state, at the same time, according to the requirements of the working conditions can change the material of the disc sealing surface to achieve the desired effect.
Features of Stainless Steel Swing Check Valve:
- The material of ZECO stainless steel swing check valve has been strictly tested to meet international standards;
- The hinge and hinge pin of ZECO stainless steel swing check valve is provided and mounted so as to permit full movement of the disc. And ZECO makes sure the disc is fully opened in the body;
- The seat of ZECO stainless steel swing check valve is renewable;
- Standard swing disc type, used in the horizontal position for liquid service application or used in a vertical position where the liquid flow from bottom to top.
- Design & Manufactured to API 6D, BS1868, or ASME B16.34;
- Face to Face Dimensions to ASME B16.10;
- Structured in Bolted Cover;
- Optional Bypass system & Counter-weight Assembly;
- Rapid closing and flexible actions of the valve disc;
- Small closing impact, water hammer is not liable to be generated;
- Swing type disc;
- Can be designed with a Damping Cylinder.
Product Range of Stainless Steel Swing Check Valves
- Nominal diameter:1/2″~60″
- Pressure range: Class150 –1500
- End Connection: RF, RTJ, BW
- Working temperature:-46℃~+560℃
Should the Swing Check Valve Be Installed Vertically or Horizontally?
We hear many people ask, “Can swing check valves be installed vertically?”
The simple answer to that question is yes, swing check valves can be installed in both directions. But to be very clear, installing a swing check valve on a horizontal pipeline can actually look like the valve is vertical. When you install a check valve on a vertical pipeline, the valve will be horizontal.
However, it’s most common to install a swing check valve on a horizontal pipeline. When people are asking if swing check valves can be installed vertically, they are usually referring to the pipeline.
How to Install Swing Check Valves Vertically
Installing a swing check valve on a vertical pipeline doesn’t change the installation process, but you need to make sure the flow arrow points up. This enables water flow through the pipeline to travel upwards, and prevents gravity from pulling it back and contaminating the water supply.
Although there are different sizes and styles of swing check valves, you can look at this diagram to see how it works from the inside.
Steps for Installing Swing Check Valve
The work of attaching a swing check valve to a pipeline is extremely easy, but you’ll find that it’s worth your time to go slowly and check things carefully. It’s much easier to catch a problem during installation than it is to uninstall or replace your swing check valve.
Here are the steps to install a swing check valve:
- Check Valve Size Before you purchase your swing check valve, make sure that you know the size and style you need. Measure the pipes you will be attaching the valve to, and check the material. There are threaded valves, socket valves, and materials such as carbon steel, stainless steel, and PVC. You can see even more options here.
- Look Inside the Valve Quickly taking a look inside the valve will ensure that nothing got stuck inside during shipping. If something small made its way into the swing check valve, it could potentially cause the flap to get stuck and prevent all water from flowing. This is a quick and easy step that could save you hours of time and frustration.
- Check the Edges Whether you need a swing check valve with flanges or not, you should check the edges closely. Look for uneven edges, scratches, or anything else that could prevent your valve from sealing correctly.
- Confirm Placement of Valve This is the only step that will change depending on the direction of your pipeline. Look on your valve for an arrow that indicates the direction of flow. If you are installing your swing check valve on a horizontal pipeline, place it in the appropriate direction.
If you are installing your swing check valve on a vertical pipeline, make sure the flow arrow is pointing up.
- Attach Swing Check Valve onto Pipeline Finally, you can attach your swing check valve to your pipeline. Depending on the type of valve you’re using, you will either need to screw it with your hands or simply put the pieces together and make sure they’re secure.
- Test the Valve You can test the functionality of your swing check valve by turning your water on and making sure it is flowing. If you use a clear PVC valve like this one, testing is easy because you can see how the valve is performing.
If during testing, you find that your water flow is blocked, you should double-check the direction of your swing check valve. If you notice leaking or any other problem, you can troubleshoot using the tips below.
Material of Stainless Steel Swing Check Valves
| No | Part | Material |
| 1 | Body | ASTM A351 CF8 |
| 2 | Seat | ASTM A182 F304 |
| 3 | Disc | ASTM A351 CF8 |
| 4 | Arm | ASTM A351 CF8 |
| 5 | Nut | ASTM A194 8 |
| 6 | Pin | ASTM A182 F304 |
| 7 | Connector | ASTM A351 CF8 |
| 8 | Gasket | Graphite + SS304 |
| 9 | Bonnet | ASTM A351 CF8 |
| 10 | Bolt | ASTM A193 B8 |